

Working With Files in GSuite Google Drive
Working with Files
As Google Drive acts as an always available storage space for your files, it is important to learn how to manage those files and add new ones. Over the course of this topic you will learn how to add new files and remove any files that you do not need any longer.
Topic Objectives
In this topic, you will learn how to:
- upload files to Google Drive using the webpage.
- upload and sync files through the desktop app.
- delete and recover your files.
Upload Files to the Web
While any file created through one of the Google Apps will automatically be saved to My Drive, anything else you wish to add to your Google Drive account will need to be uploaded.
Instructor Tip: Download is the term used when you retrieve a file from a server that your computer has connected to, such as Google Drive. Upload is the term used when you send a file to such a server. These terms are not interchangeable.
You may upload files to your Google Drive account using either the webpage interface or through the desktop app, ‘Drive File Stream’. Typically, you would use the webpage interface to add only a handful of files, while the desktop app is better suited to uploading many different files at the same time and keeping files synchronized between the copies on your computer and in Google Drive.
To upload files using the https://drive.google.com interface, first ensure that the My Drive section is displayed. Next, use your mouse to click and drag the file(s) in question from their storage location on your computer to the open browser window. Be careful to place it in the My Drive section:
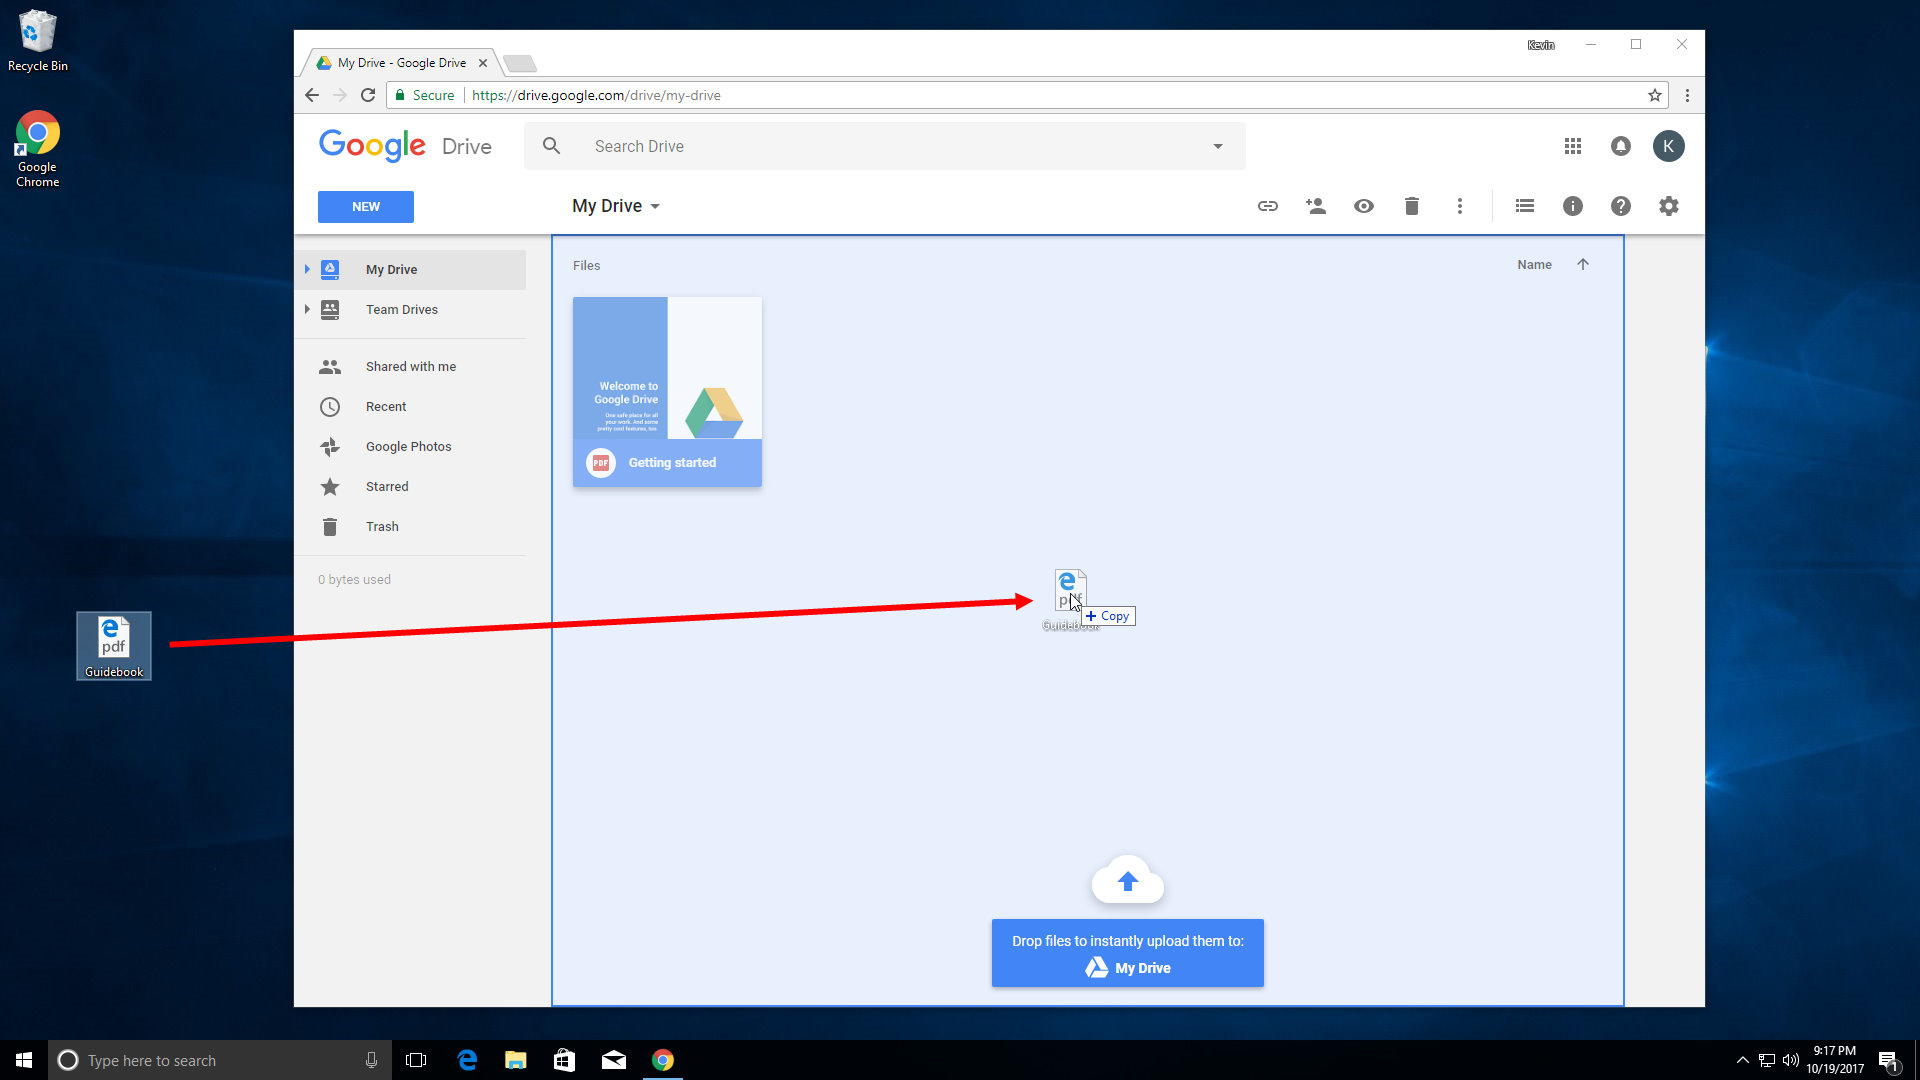
When the My Drive section appears with a blue overlay, you know you are in the right place. Release the mouse button to drop the file into place and upload it to Google Drive.
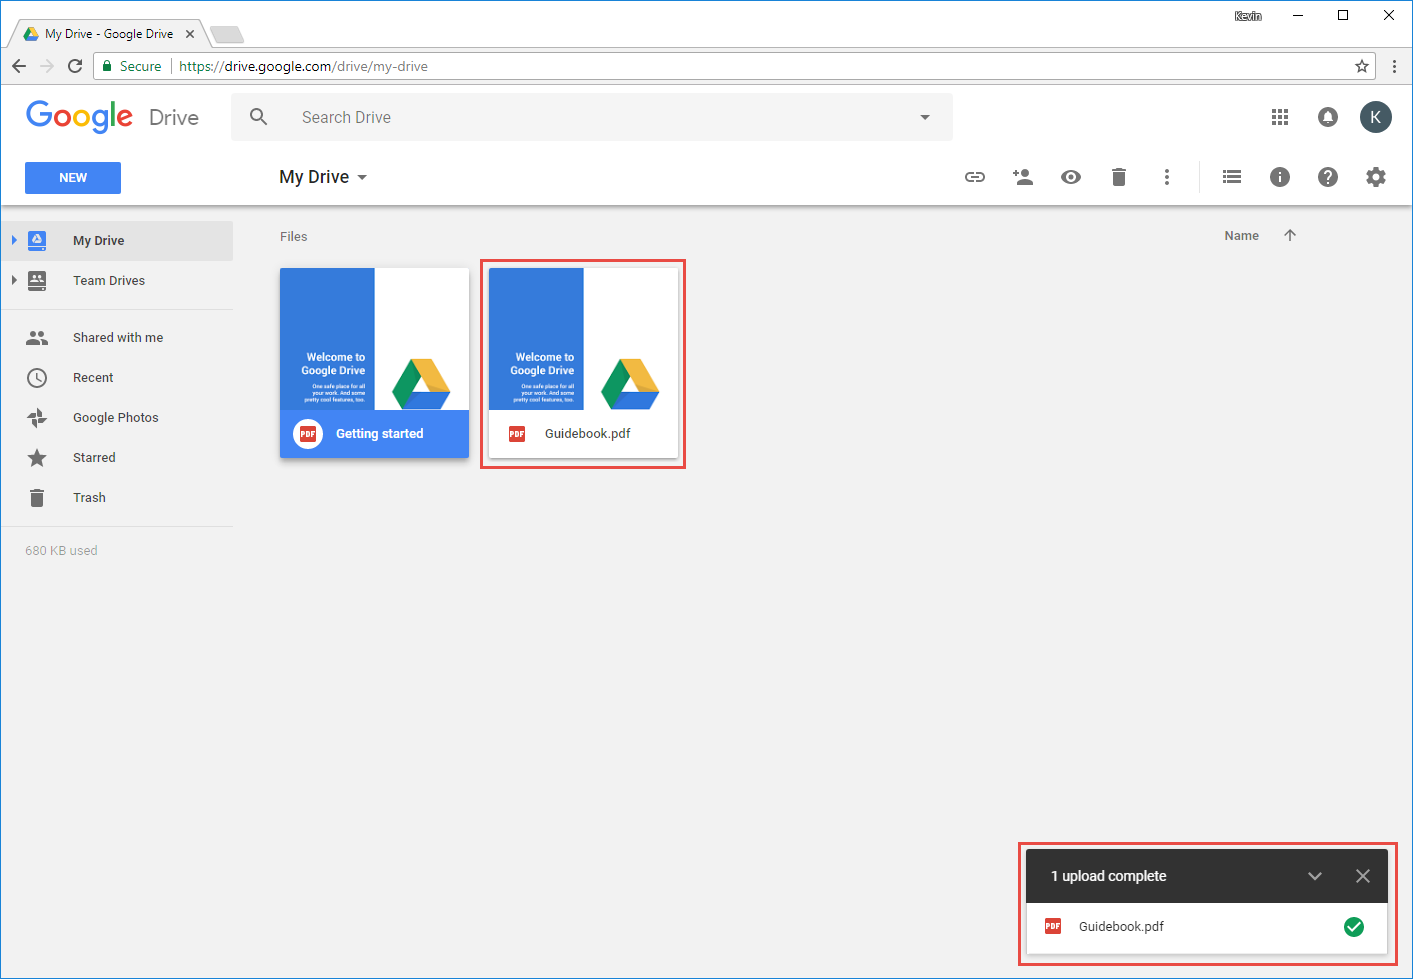
A progress bar will be displayed to indicate the progress of the upload. When it is completed, a small notification will be displayed in the lower-right corner of the page. The file itself will be listed in My Drive.
Upload and Sync Files with Drive File Stream
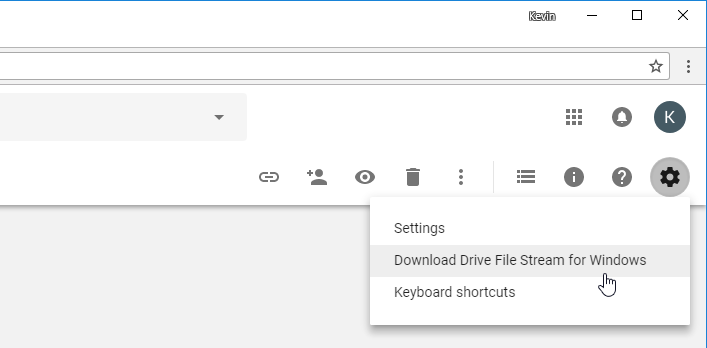
The Drive File Stream application is available for both Windows and Mac computers and is available for download from the Google Drive page by clicking Settings → Download Drive File Stream:
By following the steps provided on the subsequent page, you will be able to install the Drive File Stream application to your computer. After logging into this application, the installation will be complete, and your computer will be modified to allow you access to your Google Drive account directly from your computer.
Instructor Tip: Drive File Stream will automatically start each time you log into your computer.
If you are using Microsoft Windows, you will be able to access your Google Drive account by first opening File Explorer:

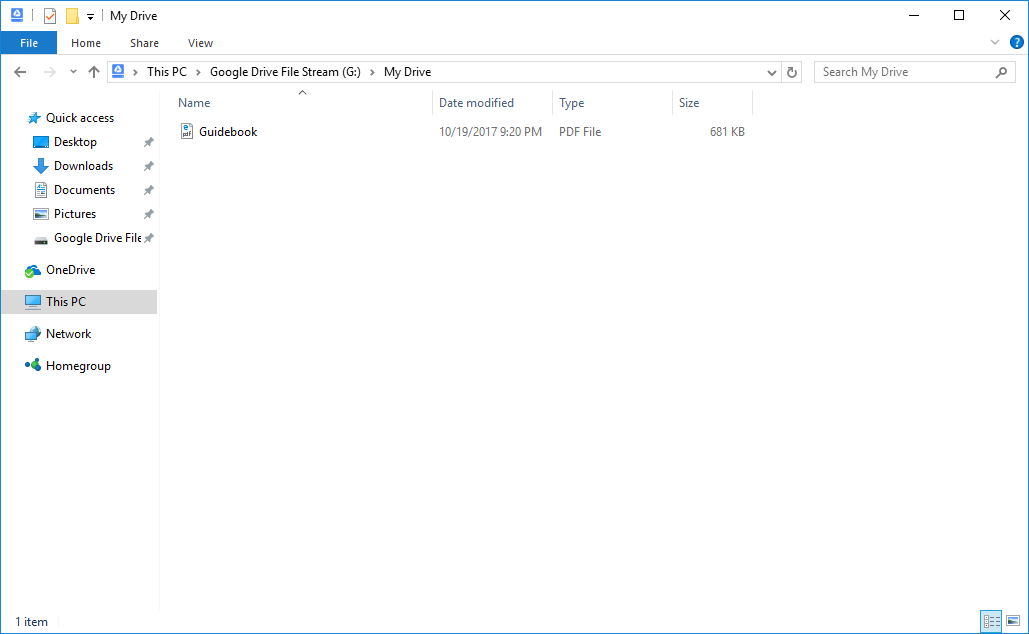
With File Explorer open, you will see Google Drive Files listed in the Quick access section of the navigation pane. Clicking on this link will open the G:\ drive:

Instructor Tip: You may access your Google Drive files directly by opening the G:\ drive in File Explorer through This PC or typing ‘G:\’ into the Location field.
The G:\ drive will list both My Drive and Team Drives. To view the contents of only the files stored in My Drive, double-click on its listing. Now the contents of this drive will be listed in File Explorer:
To upload files to your Google Drive, just place them in this folder and they will automatically be uploaded. Most importantly, any changes you make to this file on your computer will automatically be reflected in the copy that appears in your Google Drive account and vice-versa.
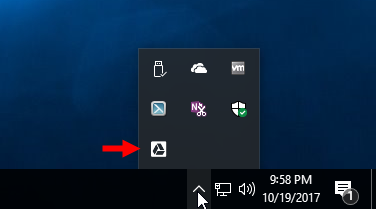
To view the status of any uploads or information about your Google Drive account, you can use the Drive File Stream notification icon that appears on the right side of the Windows taskbar. If you do not see this icon, expand the notification area by clicking on the upward pointing arrow:
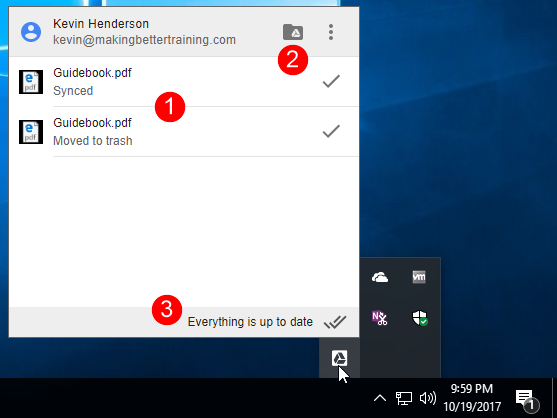
Right clicking on the Drive File Stream icon will display any recent changes made in Google Drive, such as new files, file changes (1), as well as any items that are being synced (3). You will also see a button to open the G:\ folder on your computer (2):
Clicking the Settings button lists options to find more information about Drive File Stream; switch the account that is using it, sign out of the app, or quit it:

Delete and Recover Files
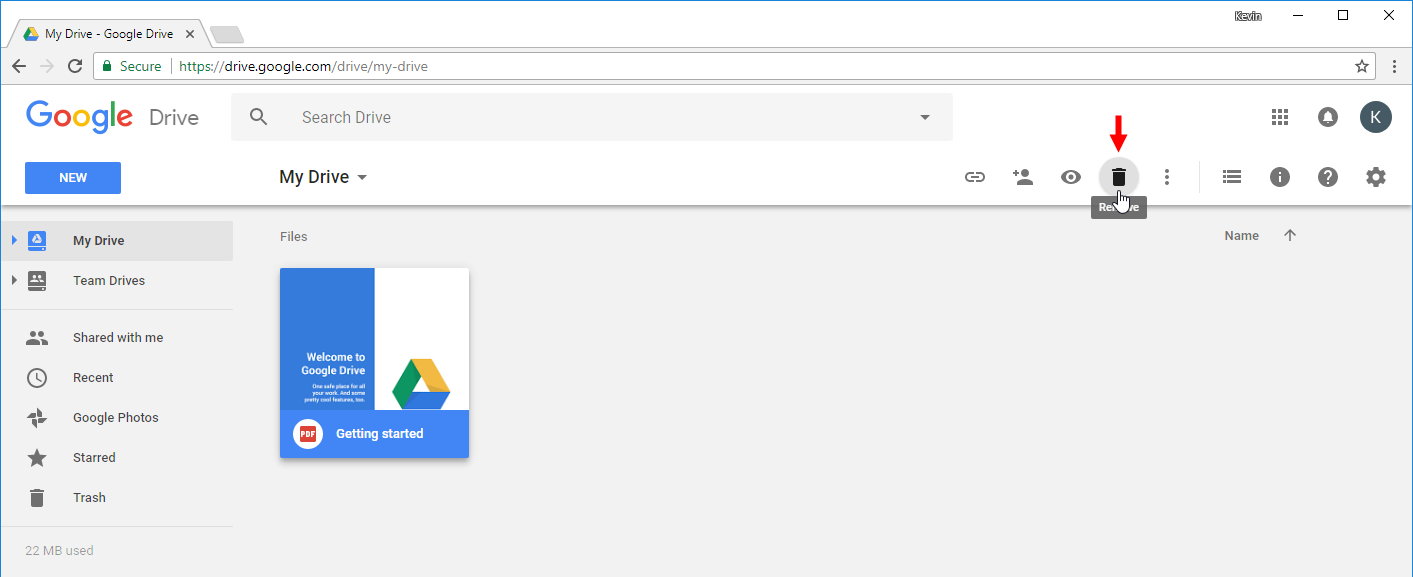
Just as you can add files to your Google Drive, you can delete them. To delete any files within your account, first click to select the file and then near the upper-right corner of the page click the Remove button:
Instructor Tip: You can also simply press Delete on your keyboard with the file selected.
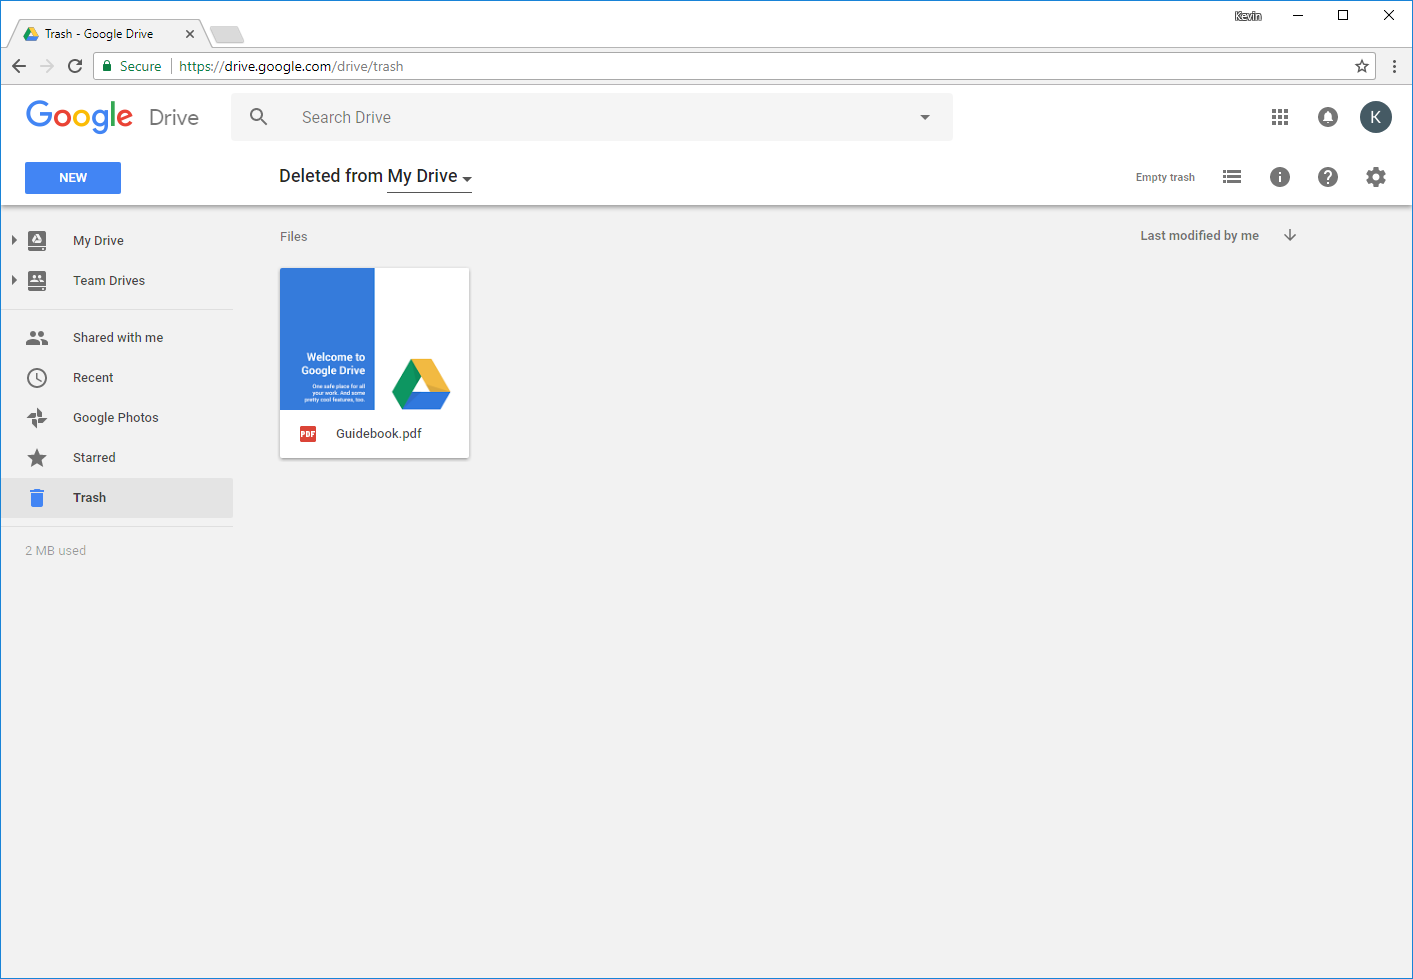
The file will immediately be moved to the Trash folder. This folder is accessed by clicking the ‘Trash’ button on the navigation pane:

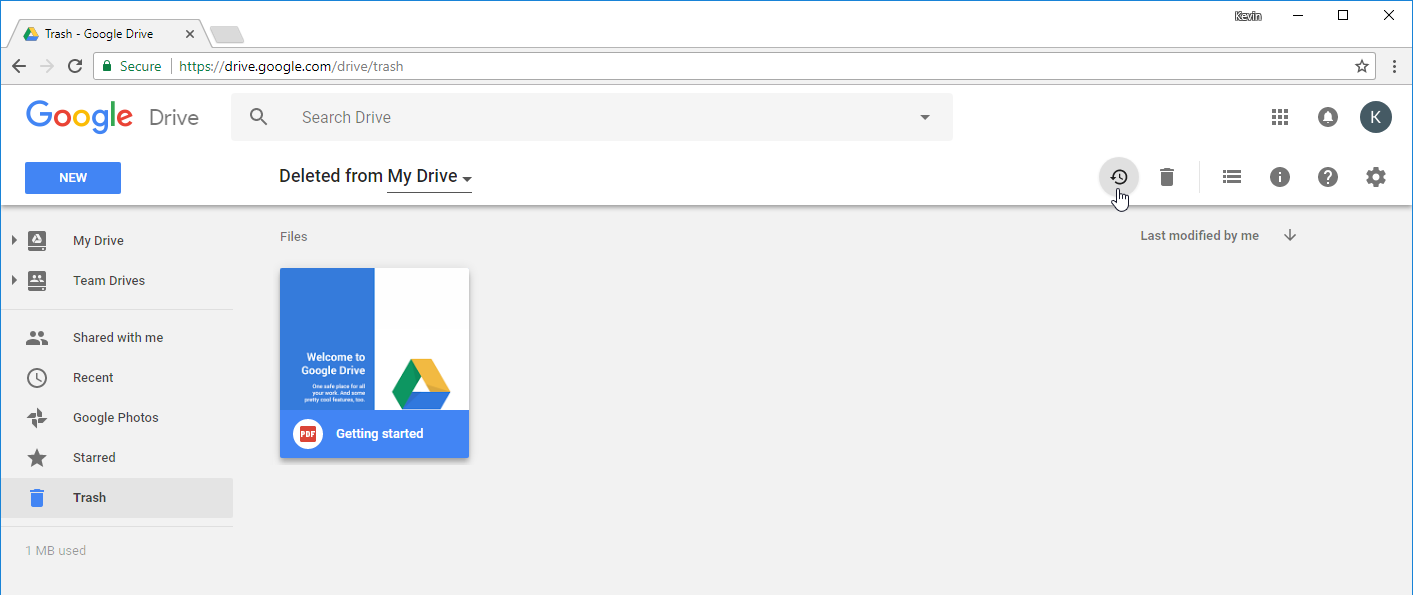
Inside the Trash folder will be any files and folders that you may have chosen to delete:
Items will be stored in ‘Trash’ for a set amount of time before they are deleted. Alternatively, you can choose to permanently delete a file by selecting it in ‘Trash’ and clicking the same delete button previously used. If no files are selected, the delete button will show as Empty trash. When clicked, this option will delete all files in the trash:

Remember that any files that are deleted from ‘Trash’ cannot be recovered.
To recover a file that you deleted and moved to the Trash, first select the file in question from inside the Trash folder. Next, on the toolbar near the upper-right corner of the page, click the Restore button:
The file will then be restored to the folder from which it was originally deleted.
Instructor Tip: The notification for the restore action includes a link to locate a recently restored file.
This is an excerpt from Velsoft’s latest computer course: Google G Suite Connect and Access. If you are joining the more than four million businesses globally that are using Google G Suite as your productivity hub for teams, Velsoft’s G Suite Create and G Suite Connect and Access can help smooth the road.
Leave a Reply

